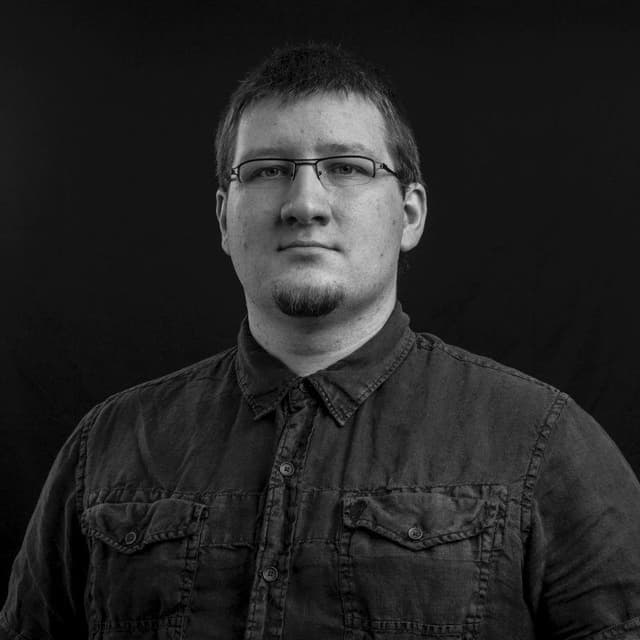
Project LIBMS: Li-Ion Battery Monitoring System
April 29, 2011
LIBMS by Vaidas Sirtautas is licensed under a Creative Commons Attribution-NonCommercial-ShareAlike 3.0 Unported License. Permissions beyond the scope of this license may be available at http://sadiav.wordpress.com
Video
or you can watch in HD on Youtube.
Problem
Let’s start with a problem…
In order to have my phone as well as my BlueTooth audio headset working I had to carry two different chargers to workplace. Moreover, I needed to find an unused socket to plug them in. And that’s really annoying…
Idea
I could see two possible solutions:
- Buy a charger that uses batteries and provides 5V to charge my devices
- Build one of my own
And, of course, I went with choice #2. I had some Lithium Ion batteries lying around. And this was the starting point of LIBMS.
LIBMS
It would be crazy to just power devices through some voltage regulator. LiIon cells do not like to be discharged below 3V and without some additional circuitry it was impossible to check whether they were OK to continue providing power to the devices. (Well, I could carry a multimeter and measure each of them from time to time, but that would be crazy
)
I found some IC’s that are capable of monitoring LiIon batteries, but where’s the fun in that…
I had some Atmega328 chips laying around. They have a 6 channel 10-bit ADC (there is actually only one ADC, but built-in multiplexer expands the inputs to 6). Awesome.
Batteries
I connected 3 of the batteries in series and then that block with another block of three batteries in parallel. V1..V6 show my tap points that are used to measure each cells voltage. E.g.
- V(G2) = V2 – V1
- V(G3) = V6 – V(G2)
- …
- V(G6) = V6 – V(G5)
Voltage regulators
At the beginning of this project I had some problems with voltage regulation. I powered the microcontroller (uC) directly from the main voltage regulator (LM338), but when a device was connected that requires a lot of current the voltage suddenly dropped and uC restarted. Not good…
I solved this problem by introducing secondary LM7805 voltage regulator that is used to power the uC and LM338 takes care of the USB ports. Using this structure provided me with a cool way for controlling the USB ports from uC.
Browsing through the LM338′s data-sheet I found an example where the regulator can be controller using a TTL signal. Perfect. Even though it does not shut down completely (there is still ~1.25V on the output), it does the job.
Sensing part
Because Atmega328 can measure up to 5V max, I had to scale down the voltages of the cells. To do that I used voltage dividers. There are 5 of them, connected to ports A0..A4. Resistors (with values specified) are R1..R10 in the schematic.
Schematic & PCB layout
*Click on the images for hi-res version.
There is a 10K pull-up resistor (not shown in schematic) connected from BC337 base to Vcc to ensure that Voltage regulator stays off while uC is starting up.
Code
This code was written using Arduino IDE (www.arduino.cc)
int analogValues [5];
int voltages[6];
unsigned char i; // Loop variable
byte LEDs = 0;
byte tempLEDs = 0;
boolean turnOn = true;
boolean updated = false;
boolean firstrun = true;
byte portVal;
byte LEDstates[] = {
0xFF, 0xDF, 0x9F, 0x1F, 0x0F, 0x07, 0x03, 0x01, 0x00};
void setup()
{
// Set Transistor's pin to output
pinMode(8, OUTPUT);
digitalWrite(8, HIGH);
// Set LED pins to outputs
pinMode(5, OUTPUT);
pinMode(6, OUTPUT);
pinMode(7, OUTPUT);
pinMode(9, OUTPUT);
pinMode(10, OUTPUT);
pinMode(11, OUTPUT);
pinMode(12, OUTPUT);
pinMode(13, OUTPUT);
// Set analog inputs
pinMode(A0, INPUT);
pinMode(A1, INPUT);
pinMode(A2, INPUT);
pinMode(A3, INPUT);
pinMode(A4, INPUT);
// Disable Pull-up resistors on analog pins
digitalWrite(A0, LOW);
digitalWrite(A1, LOW);
digitalWrite(A2, LOW);
digitalWrite(A3, LOW);
digitalWrite(A4, LOW);
for (i = 0; i < 9; i++)
{
tempLEDs = LEDstates[i];
updateLEDs();
delay(500);
}
delay(1000);
}
void updateLEDs()
{
PORTD = (PORTD & 0x1F) | (tempLEDs & 0xE0);
PORTB = (PORTB & 0xC1) | ((tempLEDs & 0x1F) << 1);
}
// Scale because of voltage divider by 2.624
void loop()
{
if (turnOn && updated)
{
digitalWrite(8, LOW);
updated = false;
}
if (!turnOn && updated)
{
// Serial.println("turn OFF");
digitalWrite(8, HIGH);
updated = false;
}
// Read status of all batteries
for (i = 0; i < 5; i++)
{
analogValues[i] = analogRead(i);
delay(10);
}
voltages[0] = analogValues[4];
voltages[1] = analogValues[3] - voltages[0];
voltages[2] = analogValues[2] - voltages[1] - voltages[0];
voltages[3] = analogValues[1];
voltages[4] = analogValues[0] - voltages[3];
voltages[5] = analogValues[2] - voltages[4] - voltages [3];
// Take care of low voltage per cell situations
// Minimum threshold for a cell is 3.0V.
// Minimum value is 3/(5/1024) = 614.4
// Scaled because of voltage divider by 2.624,
// so 3V = 614/2.624 = 234 units
boolean stopLoop = false;
i = 0;
while ( i < 6 && !stopLoop)
{
if (voltages[i] < 234)
{
stopLoop = true;
turnOn = false;
updated = true;
digitalWrite(8, LOW);
// Enter infinite
loop while (1) { };
}
i++;
}
//Serial.println(analogValues[2], DEC);
// Take care of LED's
if (analogValues[2] > 920) // 11.8V
tempLEDs = LEDstates[0];
else
if (analogValues[2] > 889) // 11.4V
tempLEDs = LEDstates[1];
else
if (analogValues[2] > 858) // 11.0V
tempLEDs = LEDstates[2];
else
if (analogValues[2] > 827) // 10.6V
tempLEDs = LEDstates[3];
else
if (analogValues[2] > 796) // 10.2V
tempLEDs = LEDstates[4];
else
if (analogValues[2] > 765) // 9.8V
tempLEDs = LEDstates[5];
else
if (analogValues[2] > 734) // 9.4V
tempLEDs = LEDstates[6];
else
tempLEDs = LEDstates[7];
// Something changed in total battery voltage
if (LEDs != tempLEDs)
{
LEDs = tempLEDs;
updateLEDs();
/* My old idea...
// First three LED's
tempLEDs = tempLEDs >> 5; // Right shift by 5 to get first three bits
tempLEDs = tempLEDs << 5;
portVal = PORTD;
portVal = portVal << 3; // Right shift to get rid of last three bits; portVal = portVal >> 3; // Left shift to restore first 5 bits to their positions
PORTD = portVal | tempLEDs;
// Restore temp value that changed because of all the shifting
tempLEDs = LEDs;
// Last five LED's
portVal = PORTB;
tempLEDs = tempLEDs << 3; // get rid of first three bits tempLEDs = tempLEDs >> 2; // position temp byte correctly
if (turnOn) tempLEDs = tempLEDs | 1;
PORTB = tempLEDs;
// Restore temp value that changed because of all the shifting
tempLEDs = LEDs;
*/
}
if (firstrun)
{
updated = true;
turnOn = true;
firstrun=false;
}
// Delay before next run
delay(1000);
}
Eagle files
Will be uploaded later
Nexus One: Gingerbread update
February 28, 2011
Intro
Gingerbread is finally out for Nexus One… And, of course, I could not wait for OTA update… So, after short discussion with myself decision was made to update manually…
Everything is not as easy as it seems…
Unfortunately everything did not go as smoothly as I expected. First of all, trying to update my Nexus One (stock, unrooted and without unlocked boot-loader) running Android 2.2.1 through recovery mode always gave me that annoying “E:failed to verify whole-file signature” error message. Tried maybe 10 times. After googling a bit I found out that I cannot update directly from 2.2.1 to the latest Gingerbread (2.3.3). Then I tried to update to 2.2.2. The same problem… Verification of the whole-file signature failed again.
More googling
After reading through a lot of tutorials I came to xda-developers forum. They provided some guidelines, but the tutorial was not complete. Every try resulted in “E:failed to verify whole-file signature“. I did not want to unlock the boot-loader, so the search continued…
On the forum there was a link about how to prepare N1 for Gingerbread. And this was the starting bit that was needed to move the process forward.
NOTE: Going through the following steps will delete all you info from the phone! BACK UP FIRST!
The tutorial
Installation process can be followed on the video here
(watch on Youtube in high-quality)
Step One (from androidcentral forum)
I had to restore Android 2.2 on the phone before moving to 2.3.3. To do that I:
- Downloaded Passion-FRG33.zip ROM file from here.
- Renamed it PASSIMG.zip. (must be exact name!)
- Placed PASSIMG.zip to the root of my SD card on the phone.
- Turned off the phone.
- Then I had to turn on the phone while holding VOLUME DOWN button (hold down the button and press power button)
- Phone found the PASSIMG.zip file and by Accepting the install (click VOLUME UP) I got it installed
Step Two (from xda-dev forum)
Video part: 03:05-10:21 (for some reason the video starts again after 10:21. Please just ignore it
- Downloaded the full 2.3.3 ROM from Google. Link here.
- Deleted the PASSIMG.zip file from the card. (<–IMPORTANT!!)
- Renamed the “656099b119f8.signed-passion-ota-102588.656099b1.zip” to update.zip (must be exact name!).
- Copied it to root folder of my SD card. (SD_card/update.zip)
- Turned off the phone.
- Turned on the phone while pushing the trackball’s button down.
- Selected BOOTLOADER-> RECOVERY on the screen with the skating Androids.
- Phone restarted and when Exclamation symbol appeared I pushed Power and Volume Up buttons. (At the same time!!! Might take several tries)
- Screen appeared where I, using trackball, selected “apply sdcard:update.zip“
Video
I created a “short” video about this update process. It shows update process in real time, so you’d have a reference point to see how long everything takes.
BTW, I guess I over-edited the video a bit too much… The actual error screen is not shown
Please take a look at this video if interested.
Step ONE: 00:38-03:04 (installation more or less in real time)
Step TWO: 03:05-10:21 (installation in real time)
The End
Please feel free to comment and ask questions.
Music Box Thingy: a rotary sequencer v1.0
February 10, 2011
Intro
This post is about a fourth semester project that our group did. The project was featured in Roskilde 2010 Festival. I was responsible for electronics part of the product.
Everything started form an idea…
Decision was made to create something that would make it easier for people to “break the ice”. There were several iterations of the product till Music Box was born. We decided on creating a rotary sequencer. There were two versions that were used for real-world testing.
Implementation… v1.0
First test was done in a club called Culture Box. This is where the first iteration of the Music Box v1.0 was used. It has a really simple design. Activation of the steps is done by some push-buttons with levers. Levers move and push a button when a can is inserted into a hole.
There are 32 holes in total (four instruments with 8 steps in each). This means that input from 32 buttons had to be gathered. We decided on using multiplexers this way expanding possible input count on Arduino.
There were four of these boards because each has 8 inputs that are sent through 1 channel (in normal words it is 8:1 mux).
For indicating which step the sequencer was on we used LED’s that went from the inside of the circle to the outer most hole.
LED’s are controlled by Arduino via serial-in-parallel-out shift register.
Testing
Now some photos from the Culture Box…
And this is me deeply thinking about how well it works
Videos
Do not forget to watch in High Quality...
Exam presentation video
Stress testing Music Box
Inserting LED’s
Pitch for RedBull
More photos can be found on my facebook page: https://www.facebook.com/album.php?aid=2046676&id=1025350161&l=3af7249acd
To be continued…
This is first part of the Music Box description. Second part (Roskilde Version) is coming soon.
Windows backup failure: 0×81000033
January 27, 2011
We all must appreciate benefits of backing up. So do I, but I’ve been facing this error: 0×81000033 while doing backups (using Backup and Restore) on my new(-ish) Windows 7 Ultimate machine.
After googling a bit I found a solution that worked. Seems that the problem was because of the size of USN journal that was turned-on on System Reserved partition (the 100MB one that’s created by default).
Doing the following things helped to resolve the problem and now my backups to a remote NAS (SS4200-E).
- Run Command Prompt in administrator mode (hit Start, type cmd.exe, right-click and select Run as administrator)

- In Command Prompt type fsutil usn queryjournal F:
- If it does not say that journal is disabled then type fsutil usn deletejournal /D F:
- Retry backup. It should work as it is supposed to.
This is assuming that you have assigned letter F: to System Reserved partition. If not, you have to assign a letter to it.
- Hit Start, right-click on Computer and select Manage.

- In Computer Management -> Storage select Disk Management.
- Right-click on partition named System Reserved and choose Change Drive Letter And Paths…

- Hit Add… button and choose a letter to assign. And hit OK.
Then do the disabling of USN Journal again.
Source for this post is here.
CPU loader app
December 8, 2010
I wanted to test how my PC behaves under heavy CPU load. Googgled to find some apps that could do that, but after a minute decided to write my own
This is how CPULoader.exe was born. Usage is to load the app in command prompt. After the “CPULoader.exe” you can specify how many threads you prefer to start. Program defaults to 2.
f.ex, if you have the exe on your Desktop:
C:\Users\<your_user_name>\Desktop>CPULoader.exe 3
Here is the source (C#):
using System;
using System.Collections.Generic;
using System.Linq;
using System.Text;
using System.Threading;
namespace CPULoader
{
class Program
{
static void Main(string[] args)
{
Console.WriteLine("This program starts a number of threads (default is 2) and performs sqare root operations in an ifinite loop on random numbers to load CPU's to test it under heavy load.");
Console.WriteLine("\nProgram was created by Vaidas Sirtautas");
Console.WriteLine("\n\tUsage: CPULoader.exe <number of threads to start>");
int count = 2;
if (args.Length == 1)
try
{
count = Int32.Parse(args[0]);
}
catch (Exception e)
{
Console.WriteLine("\n\n\tException occured. Probably not a number supplied. Defaulting to 2 threads\nException message: " + e.Message);
}
Console.WriteLine("Starting {0} threads to load the cpu(s)...", count);
Thread[] threads = new Thread[count];
for (int i = 0; i < count; i++)
{
threads[i] = new Thread(doWork);
threads[i].Start();
Console.Write("\nStarted thread #{0}", i);
}
Console.WriteLine("\n\tdone! Press any key to terminate all the threads");
ConsoleKeyInfo keypress = Console.ReadKey();
for (int i = 0; i < count; i++)
{
Console.Write("\nTerminating thread #{0}", i);
threads[i].Abort();
}
Console.WriteLine("\n");
return;
}
static void doWork()
{
Random random = new Random();
double a = 0.0;
while (true)
for (int j = 0; j < Int32.MaxValue; j++)
a = Math.Sqrt((Double)random.Next(Int32.MaxValue));
}
}
}
You can also download the app from here: http://uploading.com/files/67ea5m27/CPULoader.exe/
KatMouse issues
November 28, 2010
I’ve set up a new system at home to use as my primary PC. That, of course, required reinstalling all of the programs I use daily.
Firstly it was Firefox and then KatMouse. (KatMouse is an amazing little app that does not require you to have window activated in order to scroll it. You just have to keep your mouse cursor over it.)
I got myself in a huge problem. My Logitech Anywhere MX mouse could not close tabs or open links via middle button click.
By default in Logitech’s Set Point software it’s set as “Application Switcher”. I, of course, changed it to “Middle Button”.
Everything should be fine, but no… It was still switching between windows as previously. That got me mad… I even created post on Logitech support forums. After a while playing with KatMouse‘s settings I finally figured out where the problem is.
In the settings in the Wheel Button tab None of the buttons should be selected “as push button”.
Then everything works like a charm
.
Arduino Uno has arrived!
November 11, 2010
This morning was quite awesome… Just before leaving home for university I noticed a post-truck driving by. It stopped near the entrance of my apartment. My heart started pounding… Maybe, there is my package. Yes, it was from Let Elektronik – Arduino UNO has arrived!
Here are some photos of it:
This slideshow requires JavaScript.
Can’t wait till lectures are over. Time to do some coding
Nitro tutorials (video)
July 28, 2010
After playing with my HPI Trophy 3.5 I stared on looking for more info about the way to take care of the engine and the car itself. Today I found an amazing series with tutorials related to Nitro engines.
Series was created by Squirrelod. Tutorials really helped me to understand the inner parts of a nitro engines. Please take a look
Complete list of the videos in the series:
- Vid 1 Tuning basics
- Vid 2 Stock needle settings
- Vid 3 Weather effects
- Vid 4 Fuel and glow plugs
- Vid 5 Shims
- Vid 6 reading engine temps
- Vid 7 Onsite HSN tuning
- Vid 8 Onsite LSN tuning
- Vid 9 Onsite Idle screw tuning
- Vid 10 running signs of rich, lean, and tuned
- Vid 11 Glow plugs 101
- Vid 12 air leak detection
- Vid 13 sealing air leaks
- Vid 14 compression 101
Unfortunately videos are not in high quality, but everything is quite viewable…
Hello
May 31, 2010
Hello to everyone, it’s time to start blogging.
Mostly this blog will consist of info about the projects I’m working on.
You can find more info about me on
- facebook: www.facebook.com/vaidas.sirtautas
- twitter: www.twitter.com/sadiav
- youtube: http://www.youtube.com/user/V4id4s1987
hopefully it’s going to be fun for both you, my reader, and me.


